See How It's Done
The Initial Process
Our tiles begin from large 25 lb. blocks of wet, locally sourced clay, and are subsequently extruded into thin, even strips.
Next, the clay is laid out to firm up until the perfect leathery-hard consistency is achieved.
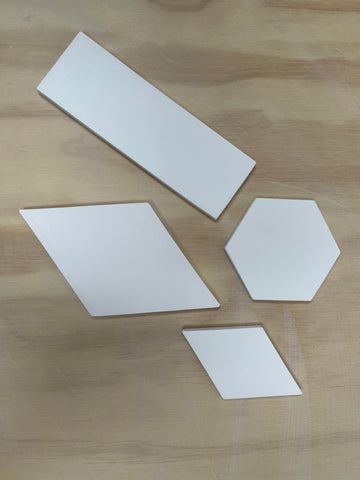
Field tile—glossy glazed tile with no surface pattern—starts taking its form when custom cutters are used to stamp out desired shapes.
Pattern tile—non-glossy tile with a visual surface pattern—undergoes the image transfer process and is also cut at this stage, but only into square shapes in order to maintain integrity of the pattern.
Keep in mind, tile shrinks when moisture slowly leaves the clay, so everything at this stage must be performed with that calculation baked in!
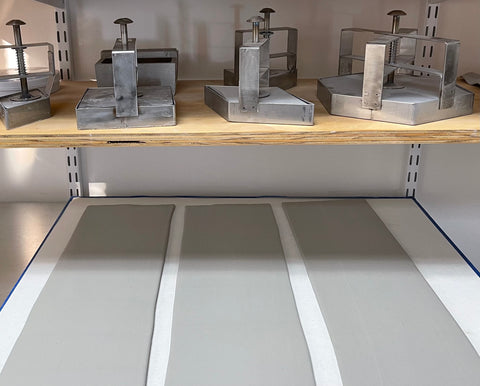
The Drying Stage
After tiles are cut into proper shapes, they need to slowly dry and expel as much moisture as possible. It's important they reach an almost bone-dry status before being fired in the kiln. This stage can be one of the most finicky, because if moisture leaves the tiles too quickly or at an uneven rate, warping can occur very easily. To properly dry tiles, it can take anywhere from to 3-6 days, depending on climate and humidity.

The Polishing Stage
Artisan tiles are imperfect, even when they're finished and even after countless hours of work that go into them. But that's really the appeal too, you're getting a handcrafted piece of functional art. That said, they always require some tending to in order to make them kiln-ready.
Clay has a memory, so every little thing that it touches becomes visible—an indent from the cutter—or even a fingerprint! Sometimes an errant fingerprint will still show up, even after the tile has been gently sanded or carefully smoothed over with specially made polishing pads.

Before Polishing
 After Polishing
The Firing Stage
Once properly air dried and polished, tiles are fired in the kiln where they are heated at high temperatures to be rid of any access moisture.
Field tile is always put in at a lower temperature here because it will ultimately be glazed and fired again to achieve a glossy finish.
Pattern tile is only fired once, but much at a higher degree and a lot more slowly. If fired too quickly, there is always a chance warpage can occur here as well.
After firing, the moisture is removed and tiles are vitrified.
The Glazing Stage
At this point, field tiles are considered bisque-ware and are more porous now that all moisture has been removed. They have shrunk substantially, resembling a closer representation of their final size and form. Glaze is applied in multiple coats and, depending on varying factors, can either be hand brushed or carefully sprayed in even layers.
Second Firing
After receiving the proper amount of glaze, field tile is fired for a second time, at a much higher temperature now. Everything will subsequently shrink an additional amount until it reaches its final form in the kiln. This baking process will usually take around 8 hours and then an additional 12 to cool off before you can even open the kiln door! Lots of things and variations can occur during this firing, so you never know exactly what you're going to get as an end result.
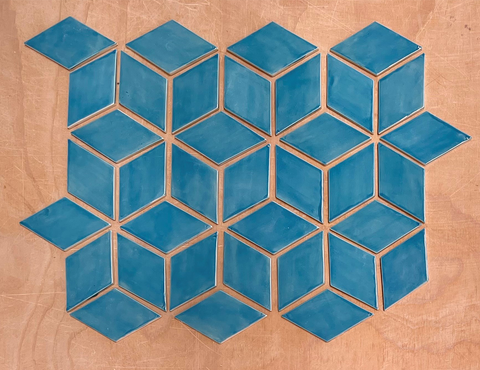
Final Product
The tiles are finally complete but still not quite ready for purchase. Every piece is carefully examined to ensure the highest quality control. Some are set aside and deemed not up to standards, while others—imperfect with a visible thumbprint but still of sound quality, will pass on to the next stage. From here, tiles will either be assembled on mesh backing in 1 square foot sheets or securely packed as individual loose pieces.